How To Draw Bubble Lettering: A Complete Guide
Unlock your creative potential with bubble lettering techniques that add personality and flair to your designs.
Introduction
Welcome to the vibrant world of bubble lettering! Whether you’re a seasoned artist or a complete beginner, mastering bubble lettering can elevate your creative projects, from personalized invitations to eye-catching murals. In this comprehensive guide, we’ll walk you through essential supplies, foundational techniques, and advanced tips to help you create stunning bubble letters that pop off the page.
Why Bubble Lettering?
Bubble lettering isn’t just about making letters look bigger or rounder—it’s about infusing them with personality and depth. This versatile style is perfect for various applications, including:
- Custom Art Projects: Enhance your drawings with playful and dynamic text.
- Graphic Design: Create memorable logos and branding materials.
- Hand Lettering: Add a personal touch to cards, posters, and journals.
- Mural Art: Make large-scale artworks more engaging and fun.
The beauty of bubble lettering lies in its flexibility. You can experiment with different shapes, sizes, and colors to match your unique aesthetic!
Essential Supplies
Before diving into bubble lettering, gather the following materials to ensure a smooth and enjoyable creative process:
1. Paper
- Smooth, Heavyweight Paper: Ideal for most lettering styles, providing a sturdy surface.
- Marker Paper: Perfect for marker work, preventing bleed-through and ensuring vibrant colors.
- Watercolor Paper: If you plan to incorporate water-based media, this is essential.
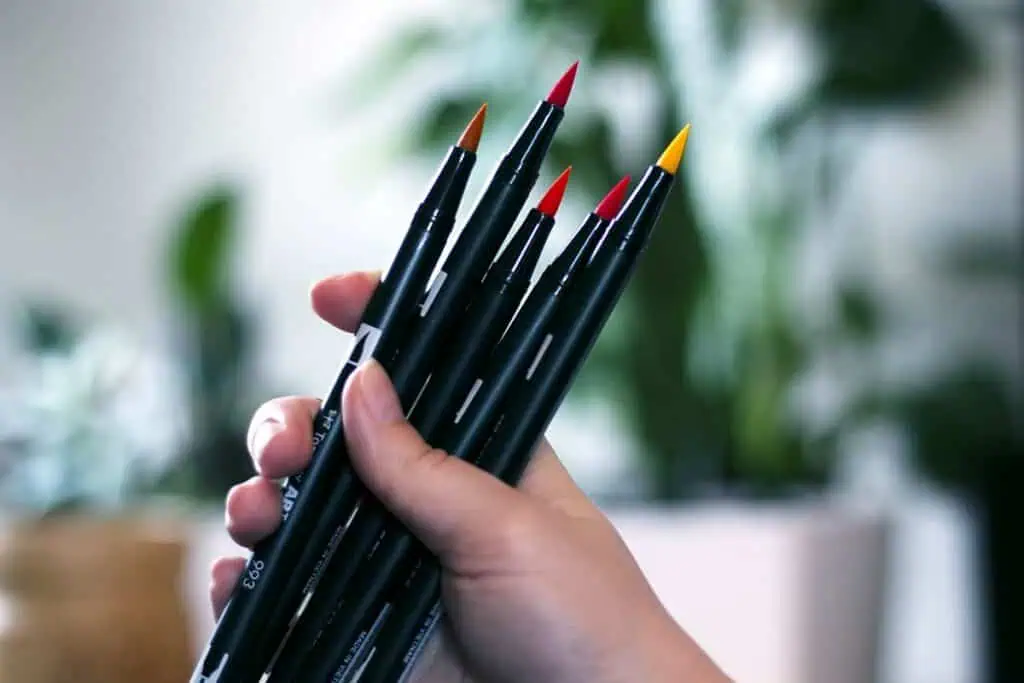
2. Markers
- Tombow Dual Brush Markers: Renowned for their versatility and range of colors.
- Alternative Brands: Any markers with a brush tip and a wide color palette will work.
3. Black Brush Pen
- Sakura Pigma: Perfect for outlining and adding intricate details.
- Alternative Brush Pens: Any high-quality brush pen that offers smooth ink flow.
4. White Pen for Highlights
- Posca Pens: Opaque and versatile for adding highlights.
- White Gel Pens or Paint Markers: Great alternatives for achieving a bright, reflective effect.
5. Erasers
- Large Erasers: Facilitate neat corrections and help tidy up your work.
- Pencil Erasers: Useful for precise adjustments.
6. Pencils
- Prismacolor Colored Pencils: Ideal for laying down light guidelines and adding color layers.
7. Additional Tools (Optional)
- Straight Edge or Ruler: Helps maintain alignment, though bubble lettering thrives on slight irregularities for a playful look.
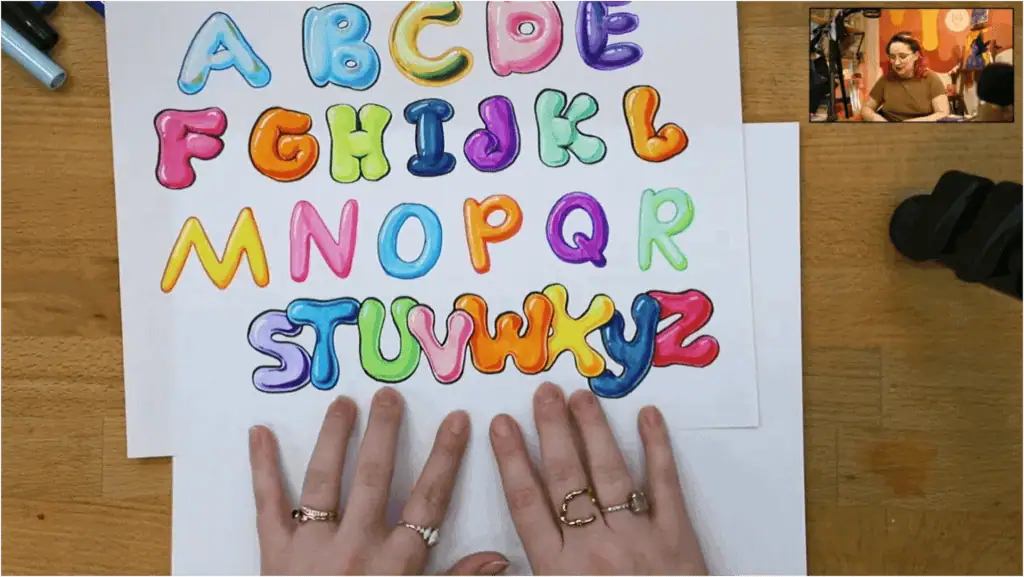
Getting Started: Basic Bubble Lettering
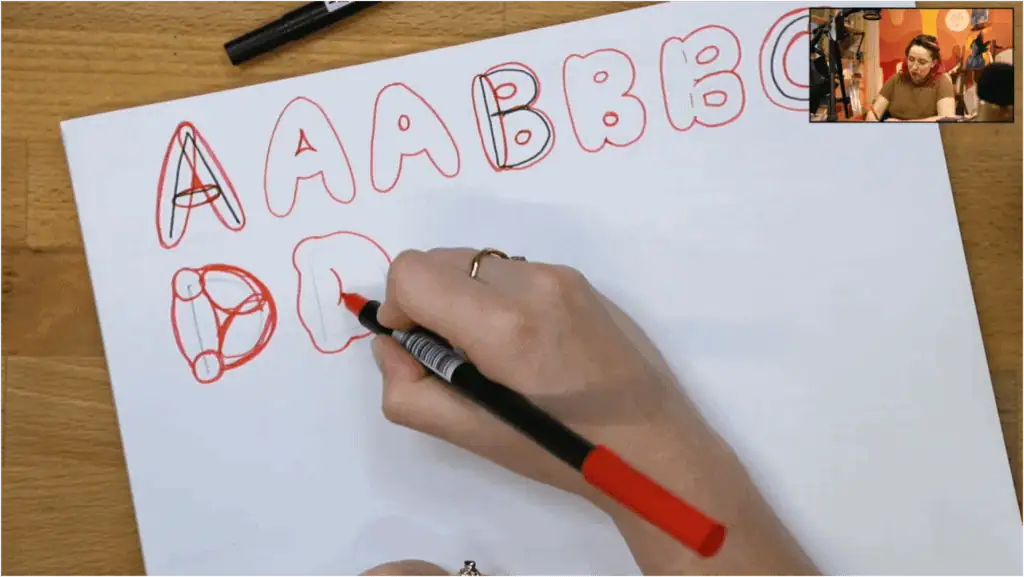
Step 1: Sketching the Foundation
Begin by lightly sketching your letters with a pencil. Choose a sans-serif, capitalized style for consistency and ease. Keep your letters uniform in size to maintain a cohesive look.
Step 2: Creating the Bubble Effect
To achieve the bubbly appearance, overlay your pencil letters with rounded, oblong shapes. These ovals should follow the contours of each letter, creating a seamless, rounded silhouette. Avoid straight lines to maintain the fluidity of the bubbles.
Step 3: Refining the Shapes
Focus on keeping all bubble letters approximately the same size and maintaining smooth, gentle curves. Consistency in your shapes ensures that your lettering looks harmonious and balanced.
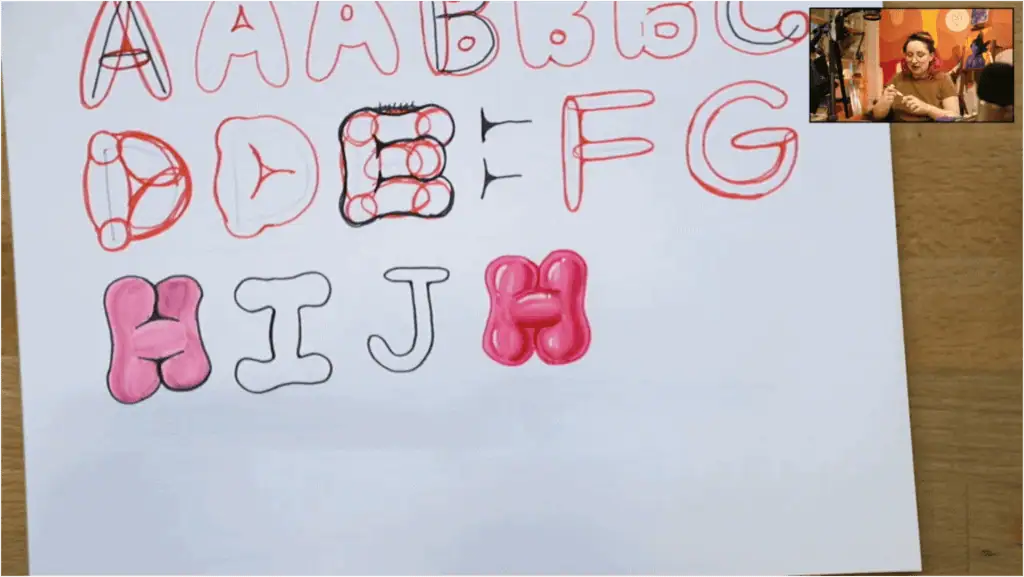
Advanced Techniques: Adding Depth and Dimension
1. Layering Colors
Using a variety of colors in light, medium, and dark shades adds depth to your bubble letters. This layering creates a three-dimensional effect, making your letters pop off the page.
- Light Shade: Apply the lightest color first to establish the base.
- Medium Shade: Add a medium tone to build depth and shadow.
- Dark Shade: Use the darkest color for creating shadows and enhancing the 3D effect.
2. Shading and Highlights
Start by imagining where the light is coming from, like the top-left, to figure out where shadows and highlights will fall. Use medium tones for areas further from the light and darker shades for the deepest shadows. To make your work pop, add highlights with a white pen on the edges facing the light—it’ll really bring out the dimension!
3. Overlapping Letters
For complex designs, overlapping letters can add dynamic interest. Make sure that overlapping areas have appropriate shadowing to maintain readability and visual appeal. Use a consistent color scheme to unify the overlapping elements.
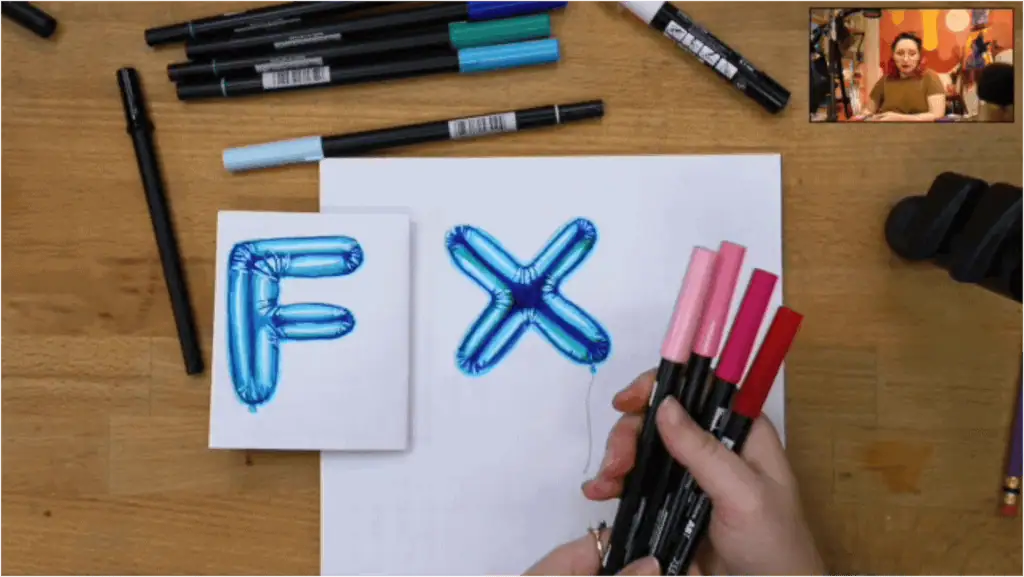
4. Foil Balloon Letters
For an extra touch of glamour, foil balloon effects can be integrated into your bubble lettering. This technique involves using metallic colors and intricate shading to mimic the reflective quality of foil balloons. While more time-intensive, the result is a striking, multidimensional text effect.
Tips for Success
- Practice Consistency: Maintain uniform shapes and sizes for a polished look.
- Experiment with Colors: Don’t hesitate to try different color combinations to find what best suits your design.
- Embrace Imperfections: Bubble lettering thrives on slight irregularities, adding character and charm!
- Stay Organized: Keep your workspace tidy and your supplies within reach to streamline your creative process.
- Layer Thoughtfully: Build up colors and shadows gradually to avoid overwhelming your design.
Common Challenges and How to Overcome Them
1. Bleed-Through Issues
To prevent markers from bleeding through paper, use high-quality marker paper or heavyweight paper. Test your markers on a small area before starting your project.
2. Maintaining Even Lines
Use a steady hand and consistent pressure when outlining your letters. Practice drawing smooth curves and rounded shapes on scrap paper to build confidence.
3. Color Selection
Choose colors that complement each other and suit the overall theme of your project. Feel free to utilize color wheels or pre-made palettes for inspiration!
Take Your Skills Further
Ready to elevate your bubble lettering to the next level? Enroll in our Bubble Lettering Class where you’ll receive in-depth instruction, personalized feedback, and access to exclusive resources. Whether you’re looking to master the basics or explore advanced techniques like foil balloon effects, this class has something for everyone.
For those seeking a more comprehensive learning experience, join the Modern Lettering Academy. As a member, you’ll gain access to a wide range of courses covering various lettering styles, live workshops, and a vibrant community of fellow lettering enthusiasts. Take advantage of structured lessons, expert guidance, and continuous support to refine your skills and unleash your creativity.
Enroll today and transform your lettering projects with confidence and flair!
Conclusion
Bubble lettering is such a fun and creative style with endless possibilities! Once you nail the basics and start playing around with advanced effects, you can design eye-catching pieces that really stand out. The key is practice—so grab your tools, let your imagination run wild, and start creating your own amazing bubble letters today!

Responses